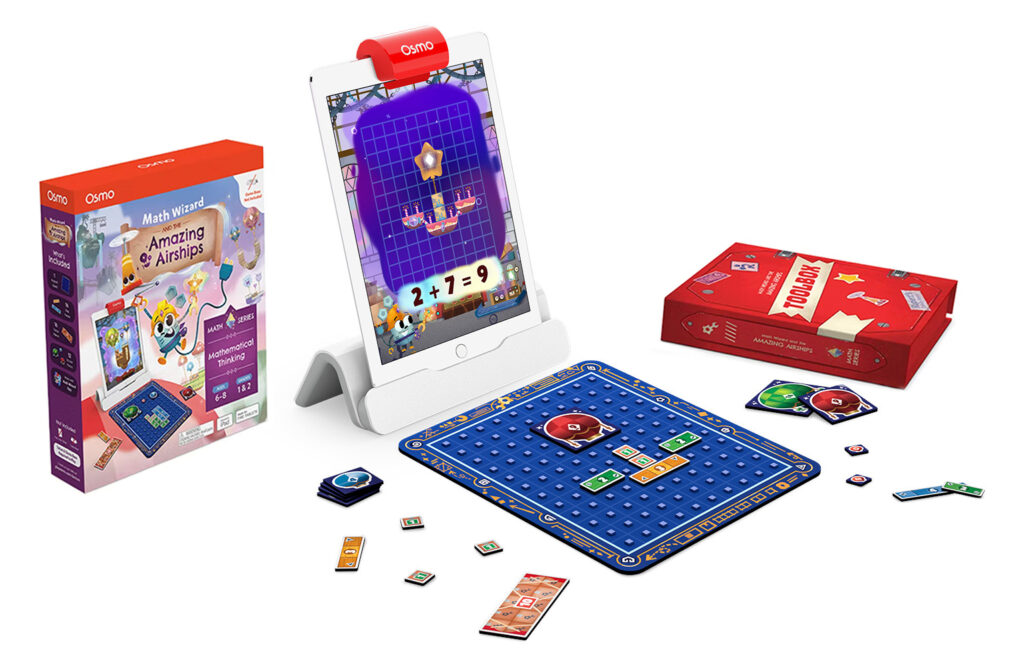
Amazing Airships is an educational game designed for kids aged 6-8, with a focus on algebraic thinking through building and balancing equations. In the game, players use math to design and balance airships loaded with packages and navigate them through weather challenges.
The game consists of three types of tiles: packages, ship, and balloon tiles, each focusing on a different math multiplier. For instance the player may be required to deliver a certain number of packages, the player must use the tiles to construct an airship to carry the packages To lift the airship, they must add balloon tiles equivalent to the number of ship and package tiles.

Key Hardware Features
- Magic Building mat: A pegboard mat to help with building and aligning game pieces. Made from injection molded ABS with printed paper sheet on top.
- Game Pieces: Made from layered coreboard with a pegboard cutout on the backside of the tile. The game includes 3 types of tiles, each with a different multiplier.
- Ship Tiles: Focuses on the multiplier of 2, 3, and 4.
- Balloon Tiles: Focuses on the square multipliers.
- Cargo Tiles: Uses the multiplier of 1 and 10.
Prototyping & Materials Exploration
My focus for this game was to create a hardware solution that allowed game pieces to be “built” similar to LEGO, but using more cost effective materials.
To ensure the game’s success, the airship designed by the kids had to be as neat as possible, enabling computer vision to successfully interpret and re-create the airship in the digital game. Through playtesting we knew that it was unrealistic to expect kids to align the tiles neatly. As a result, I knew we had to create a playmat capable of registering and aligning the tiles.
I started out by exploring several different materials and construction methods for the playmat & tiles. The three primary options explored were: embossing & debossing, vacuum forming, and injection molding.
Embossing & Debossing: I began by exploring paper, which offered a quick production time compared to injection molded pieces. However, although the tiles and mat did register slightly, it was easy to accidentally shift or rotate the tiles.
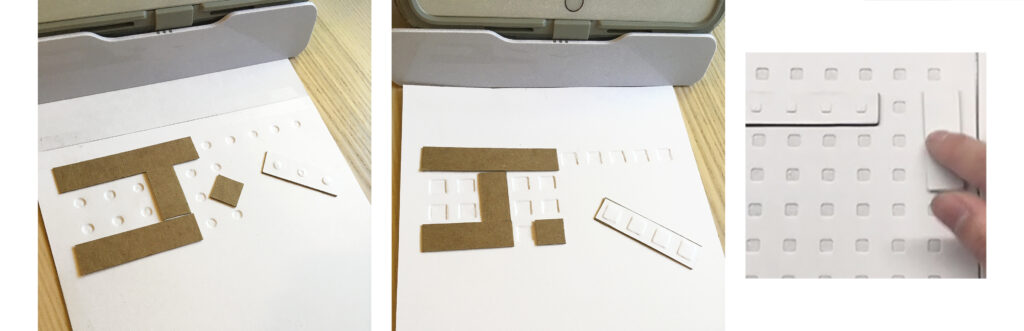
Prototype made from hand embossing cardstock and over chipboard.
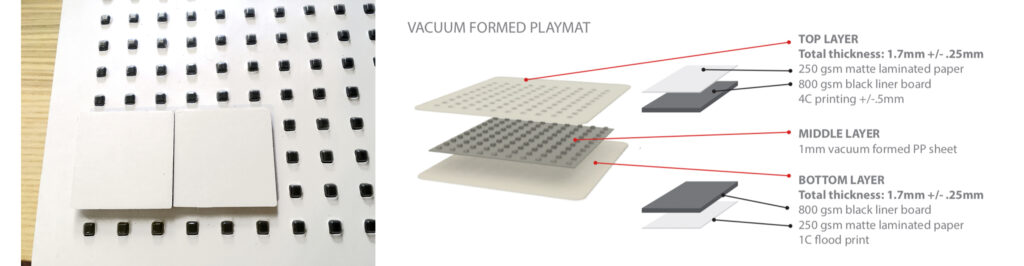
Vacuum Formed: My second concept involved sandwiching a vacuum-formed pegboard between 2 sheets of die cut chipboard. While this solution worked well, the durability of the material was not ideal. Due to the thickness variations with the vacuum formed method, the material thickness of the pegs was stretched out and thin. If the pegs were damaged it would impact the success of the alignment capability.
Injection Molded: Due to the importance of durability, we ended up proceeding with an injection molded mat with a printed paper top sheet. As for the tiles, we were able to keep the paper tile solution which was fabricated with 2 layers of die cut coreboard glued together. On one side of the tile, there was a die cut square that would register with the pegboard playmat.
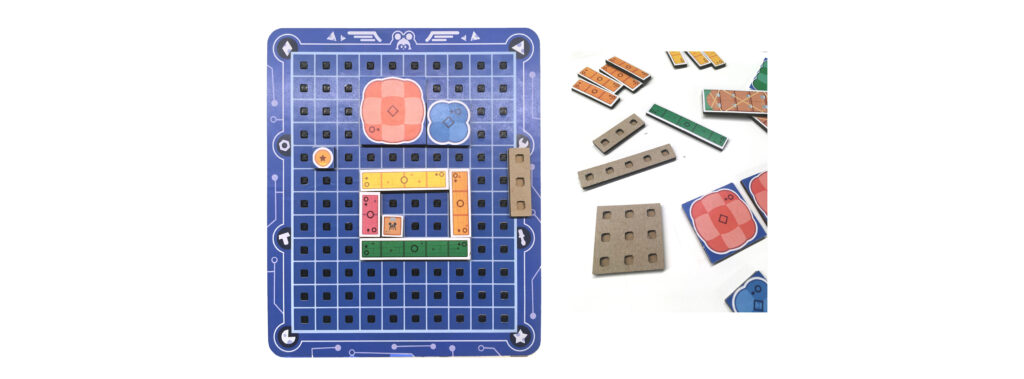
Prototype made from 3d printed board & lasercut chipboard tiles
Challenges
The construction of the tiles involved die cutting two layers of coreboard, gluing them together, and then die cutting them again. Typically, a standard paper die cut tool produces a rounded edge on the side it cuts from, and a sharp edge on the opposite side.
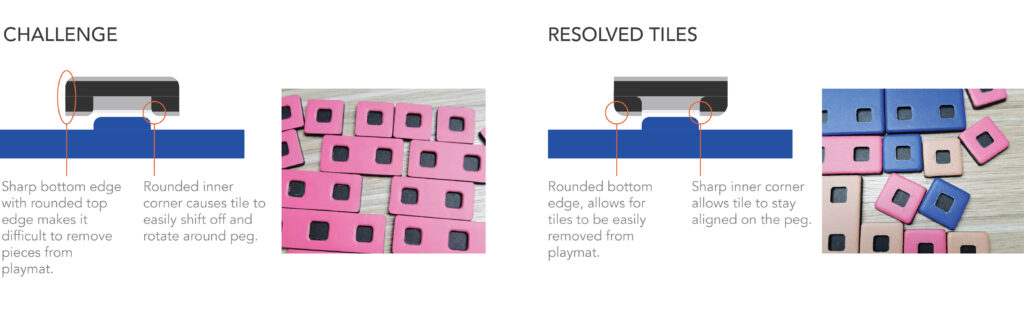
This approach of mixing and matching of die cut directions required controlling the manufacturing sequences and tolerances. In the end, I was able to produce building block game pieces from a material that was both low cost and had a quick production timeline.

Summary
Achieving accurate translation of the player’s intentions through the game computer vision required a solution with tight tolerances and attention to detail. By leveraging my knowledge of materials and their manufacturing processes, I was able to explore various material options and balance costs with quality.
Check out another project in the same Math Wizard series:
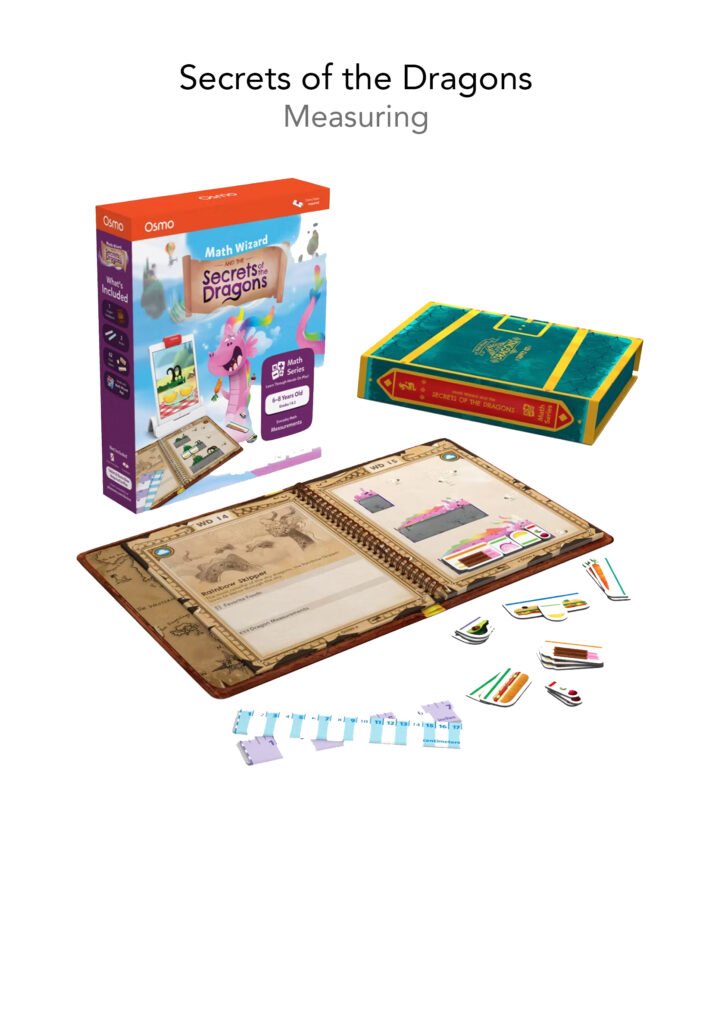
Focused on quality control for the tight tolerances of computer vision. Explored new materials and established quality assurance processes for future re-orders.
